

Router
Review
We built a graph that uses messages as state and a chat model with bound tools.
We saw that the graph can:
- Return a tool call
- Return a natural language response
Goals
We can think of this as a router, where the chat model routes between a direct response or a tool call based upon the user input.
This is a simple example of an agent, where the LLM is directing the control flow either by calling a tool or just responding directly.
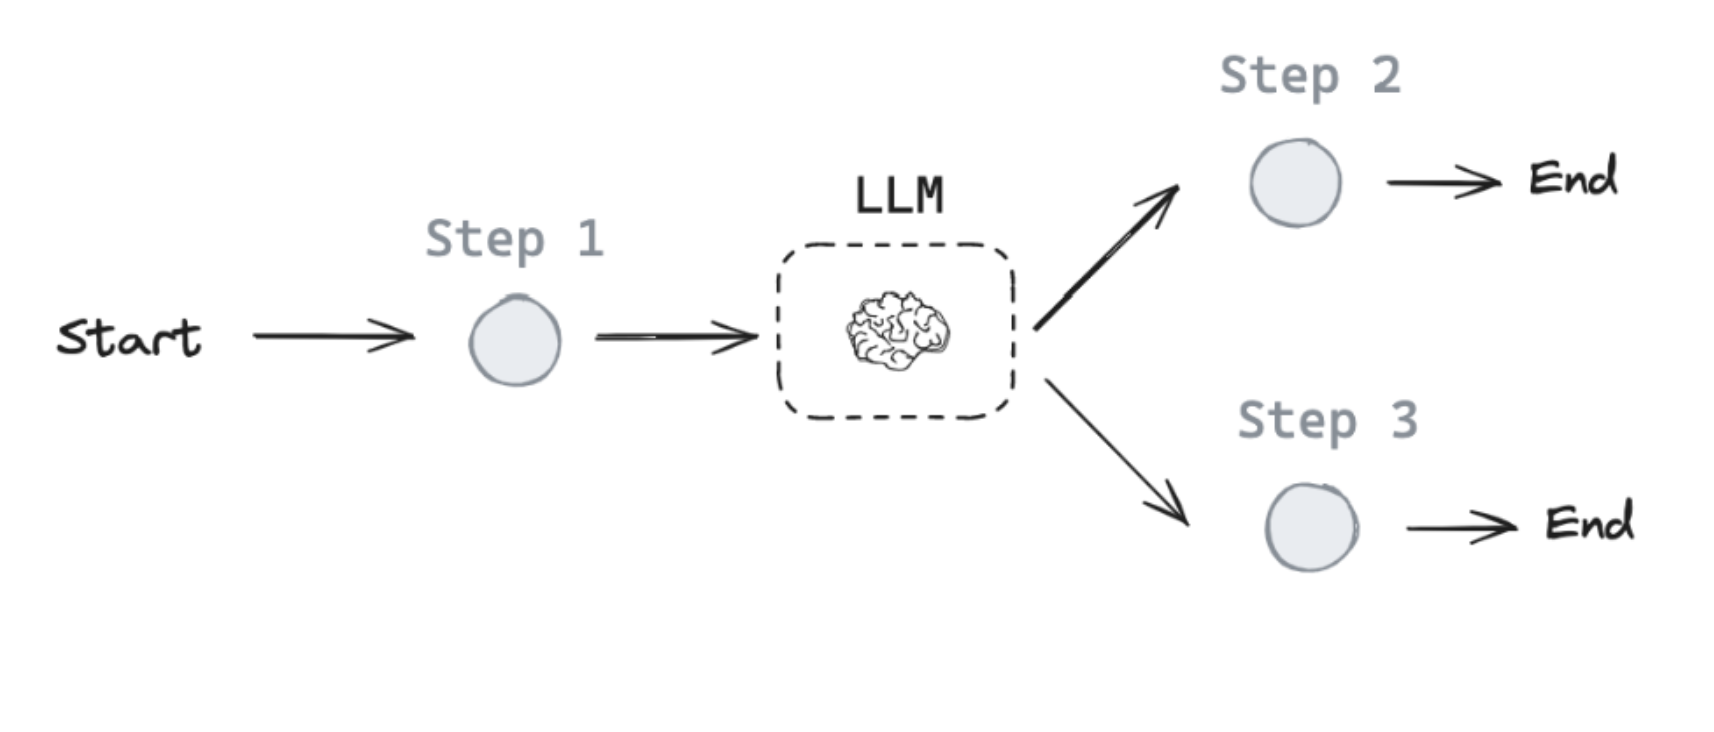
Let's extend our graph to work with either output!
For this, we can use two ideas:
(1) Add a node that will call our tool.
(2) Add a conditional edge that will look at the chat model output, and route to our tool calling node or simply end if no tool call is performed.
from dotenv import load_dotenv
load_dotenv()
%%capture --no-stderr
%pip install --quiet -U langchain-deepseek langchain_core langgraph langgraph-prebuilt
from langchain_deepseek import ChatDeepSeek

def multiply(a: int, b: int) -> int:
    """Multiply a and b.

    Args:
        a: first int
        b: second int
    """
    return a * b

llm = ChatDeepSeek(model="deepseek-v4-pro")
llm_with_tools = llm.bind_tools([multiply])
We use the built-in ToolNode and simply pass a list of our tools to initialize it.
We use the built-in tools_condition as our conditional edge.
from IPython.display import Image, display
from langgraph.graph import StateGraph, START, END
from langgraph.graph import MessagesState
from langgraph.prebuilt import ToolNode
from langgraph.prebuilt import tools_condition

# Node
def tool_calling_llm(state: MessagesState):
    return {"messages": [llm_with_tools.invoke(state["messages"])]}

# Build graph
builder = StateGraph(MessagesState)
builder.add_node("tool_calling_llm", tool_calling_llm)
builder.add_node("tools", ToolNode([multiply]))
builder.add_edge(START, "tool_calling_llm")
builder.add_conditional_edges(
    "tool_calling_llm",
    # If the latest message (result) from assistant is a tool call -> tools_condition routes to tools
    # If the latest message (result) from assistant is a not a tool call -> tools_condition routes to END
    tools_condition,
)
builder.add_edge("tools", END)
graph = builder.compile()

# View
display(Image(graph.get_graph().draw_mermaid_png()))

from langchain_core.messages import HumanMessage
messages = [HumanMessage(content="Hello, what is 2 multiplied by 2?")]
messages = graph.invoke({"messages": messages})
for m in messages['messages']:
    m.pretty_print()
================================ Human Message =================================

Hello world.
================================== Ai Message ==================================

Hello! How can I assist you today?
Now, we can see that the graph runs the tool!
It responds with a ToolMessage.
Studio
⚠️ Notice
Since filming these videos, we've updated Studio so that it can now be run locally and accessed through your browser. This is the preferred way to run Studio instead of using the Desktop App shown in the video. It is now called LangSmith Studio instead of LangGraph Studio. Detailed setup instructions are available in the "Getting Setup" guide at the start of the course. You can find a description of Studio here, and specific details for local deployment here.
To start the local development server, run the following command in your terminal in the /studio directory in this module:
langgraph dev
You should see the following output:
- 🚀 API: http://127.0.0.1:2024
- 🎨 Studio UI: https://smith.langchain.com/studio/?baseUrl=http://127.0.0.1:2024
- 📚 API Docs: http://127.0.0.1:2024/docs
Open your browser and navigate to the Studio UI shown above.
Load the router in Studio, which uses module-1/studio/router.py set in module-1/studio/langgraph.json.
if 'google.colab' in str(get_ipython()):
    raise Exception("Unfortunately LangGraph Studio is currently not supported on Google Colab")